
TM 5-3655-210-12
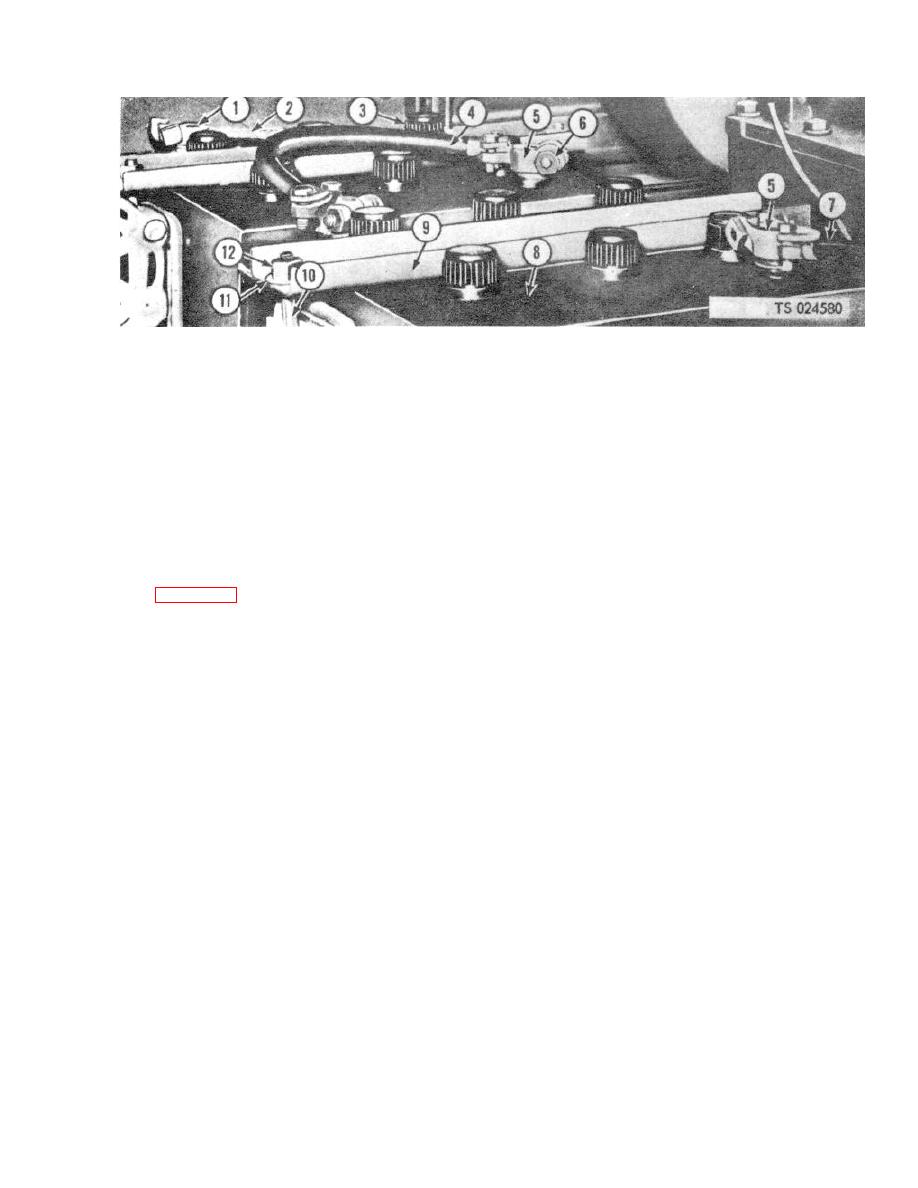
1.
Negative terminal
7.
Battery to solenoid lead cable
2.
Ground lead
8.
Battery
3.
Battery filler cap
9.
Battery hold-down bar
4.
Connector lead
10.
Bracket hold-down rod
5.
Positive terminal
11.
Washer, flat
6.
Nut
12.
Nut
WARNING
c. Remove screws (7) and take off clearance
Dry cleaning solvent, P-D-680 or P-S-
light and gasket (9). Reverse this procedure to install
661, used to clean parts is potentially
light.
dangerous
to
personnel
and
4-54.
Dome Lights
property. Use in a well-ventilated
a. To remove dome lights, disconnect wire
area as the fumes are dangerous if
connector (10, fig. 4-64), remove three screws (2)
inhaled.
Avoid
repeated
and
holding base (4) to roof of compartment. Reverse
prolonged skin contact. Do not use
procedure to install.
near open flame or excessive heat.
b. To replace lamp, loosen two screws (3)
Flash point of solvent is 100F.-138F.
holding lens (5) to base (4), turn lens to remove it, and
(38C.-59C.).
replace lamp. Reposition lens and tighten screws.
b. Cleaning, Inspection and Repair. Clean
4-55.
Failure and Gage Line Lights
with a cloth dampened in a cleaning solvent. Inspect for
a. Removal. Tag the wires of the light to be
damaged threads, cracked or broken glass, or any other
removed.
Then remove the nut and lockwasher
damage. Replace damaged parts. Reverse removal
securing the light to the panel and slide the assembly
procedure to reinstall.
out the front of the panel.
c. Replacing. To replace a burned out lamp,
unscrew the lens from the front of the light, replace the
lamp and screw the lens back in place.
4-61
