
TM 5-6640-212-14
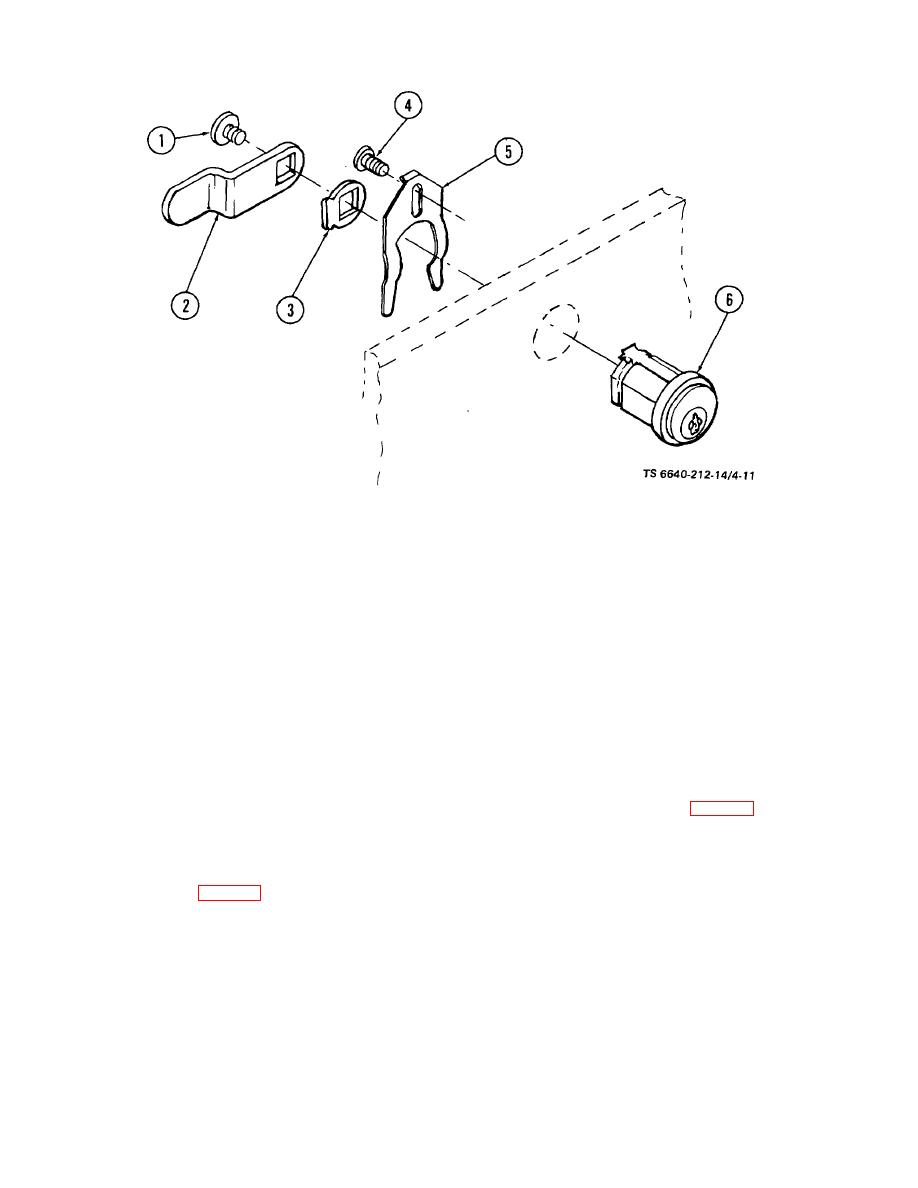
Legend for figure 4-11:
1. Screw
2. Locking tab
3. Indexing washer
4. Screw
5. Retaining spring
6. Lock assembly
Figure 4-11. Disassembly of Cabinet Lock Assembly
c. Remove screws securing socket shell (6) into
WARNING
socket (5), and remove screws securing socket onto
Be sure power has been removed
fixture body (4).
from
fixture
before
attempting
d. Remove wires from socket (5).
removal of socket or wiring.
e. Remove attaching screw securing fixture body
4-11. Centrifuge Machine. Removal.
mounting bracket (3) onto mounting plate (1).
a. Disconnect power from centrifuge machine.
f. Pull fixture body mounting bracket (3) away from
b. Remove attaching screws, nuts, and washers
mounting plate (1) until free of wiring.
securing rubber shock mounts (fig. 4-13) to shelving.
g. Remove gasket (2).
c. Remove centrifuge.
h. If necessary mounting plate (1) can be removed
NOTE
from wall by removing attaching screws.
Be sure top lids are closed before
4-10. Vapor tight Light Fixture. Removal.
trying to remove centrifuge.
a. Remove globe (9, fig. 4-12) from fixture body (4) by
unscrewing globe and remove gasket (8).
b. Remove lamp (7) from socket (5).
4-17
