TM
9-4910-743-14&P
(b) Be sure wheel seats flat
on flange to assure accurate reading.
(c) Place pedal to "ON" position.
(d) Hang weight on rim (not on
tire) . Lay one of the remaining 2 weights at
each mark and check for balance. Adjust to
center the bubble by moving weights closer
together or farther apart. EASY, now only
small movement is needed.
Place pedal to "OFF" position.
(e)
(f) Attach outside weights while wheel is still on the balancer.
4.
Maintenance Instructions.
a.
Daily cleaning.
It is necessary to periodically clean the wheel
balancer to maintain accuracy. Daily, wipe the chrome head with a rag damp with
kerosene (9140-00-242-6749). DO NOT POUR KEROSENE ON THE BALANCER. Any liquid
trapped in the cup under the cone will impair the machine's ability to balance
and cause the cone to stick.
Wipe the cabinet clean, using a rag damp with
kerosene, as required.
b. Major Cleaning. Major cleaning is required only occasionally and is
indicated by the cone becoming tight on the center tube. When the cone becomes
tight it may stick down so the wheel cannot be centered. A sticky cone may not
go down easily and may hold a light wheel up.
CAUTION
The wheel balancer head is manufactured to very accurate and close
tolerances.
When cleaning be very careful not to drop it.
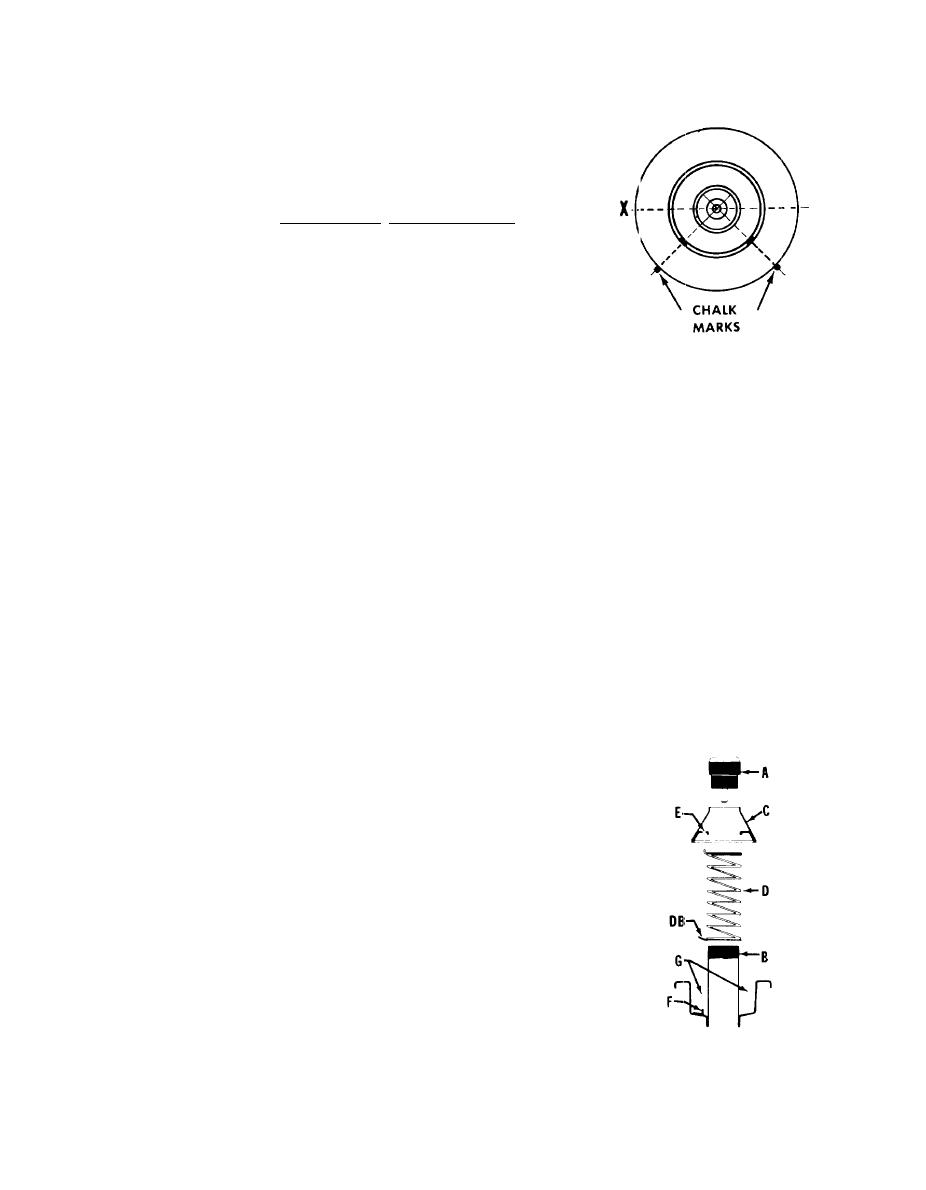
(1) DISASSEMBLY: To relieve a sticky
cone , remove the entire balancer head from the
oil basin and wipe clean with a rag.
(a) Press the cone C down with one
hand and hold it depressed. Unscrew cap A and
remove from tube B.
(b) Release cone C which will pass
off over end of tube B and stand on extended
spring D.
(c) Lift spring D and cone C out of
basin G and then remove spring D from cone C.
6


