SPRAY OUTFIT ASSEMBLY INSTRUCTIONS
The paint spray gun cup attaches to the threads on the head of the Spray Gun.
The fluid tube should point away from the gun with the cup removed. The cup is held in
place by a yoke which is activated by turning the lock ring to attach or release the cup.
An air line is attached to the threaded fitting on the handle of the gun. The other end of
the hose is attached to the shut-off valve on the separator.
DESCRIPTION
The Model 76 is a heavy-duty production spray gun
which will spray a complete range of materials, such as
lacquers to heavy synthetics, with ease, using either a
siphon cup or pressure feed.
OPERATION
There are two basic controls on the 76 spray gun. The
fan control (18) regulates air going to the holes of the air
cap. The fluid needle adjustment screw (8) controls
needle travel and fluid flow.
Mix and prepare material according to instructions for
siphon feed.
1. Attach air hose to gun at air inlet (10)
2. Attach cup or pressure feed to gun at material
inlet
3. Adjust air pressure to desired amount at the Air
Regulator
4. Adjust fluid volume by turning the fluid control
screw (8) to the left or right.
5. Adjust to proper pattern by turning the fan control
screw (18) to left or right.
The most efficient atomization air pressure is the lowest
possible air pressure that will give the desired results.
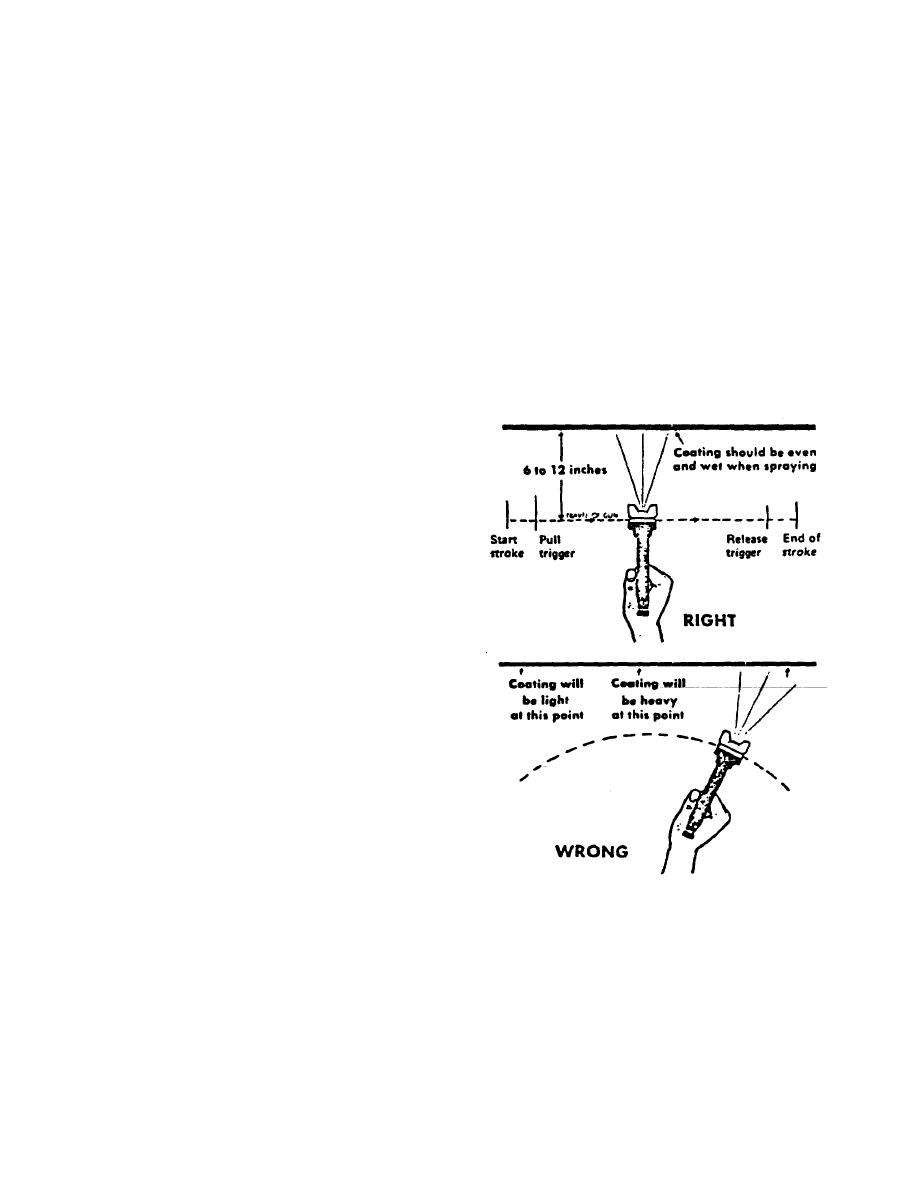
A spraying distance of 6 to 12 inches from gun to work
surface is recommended. The gun should be held
perpendicular to the surface being coated.
The stroke should be started before the trigger is pulled
and the trigger released before the end of each stroke.
1


