
TM 9-4940-500-14&P
TROUBLESHOOTING AND REPAIR
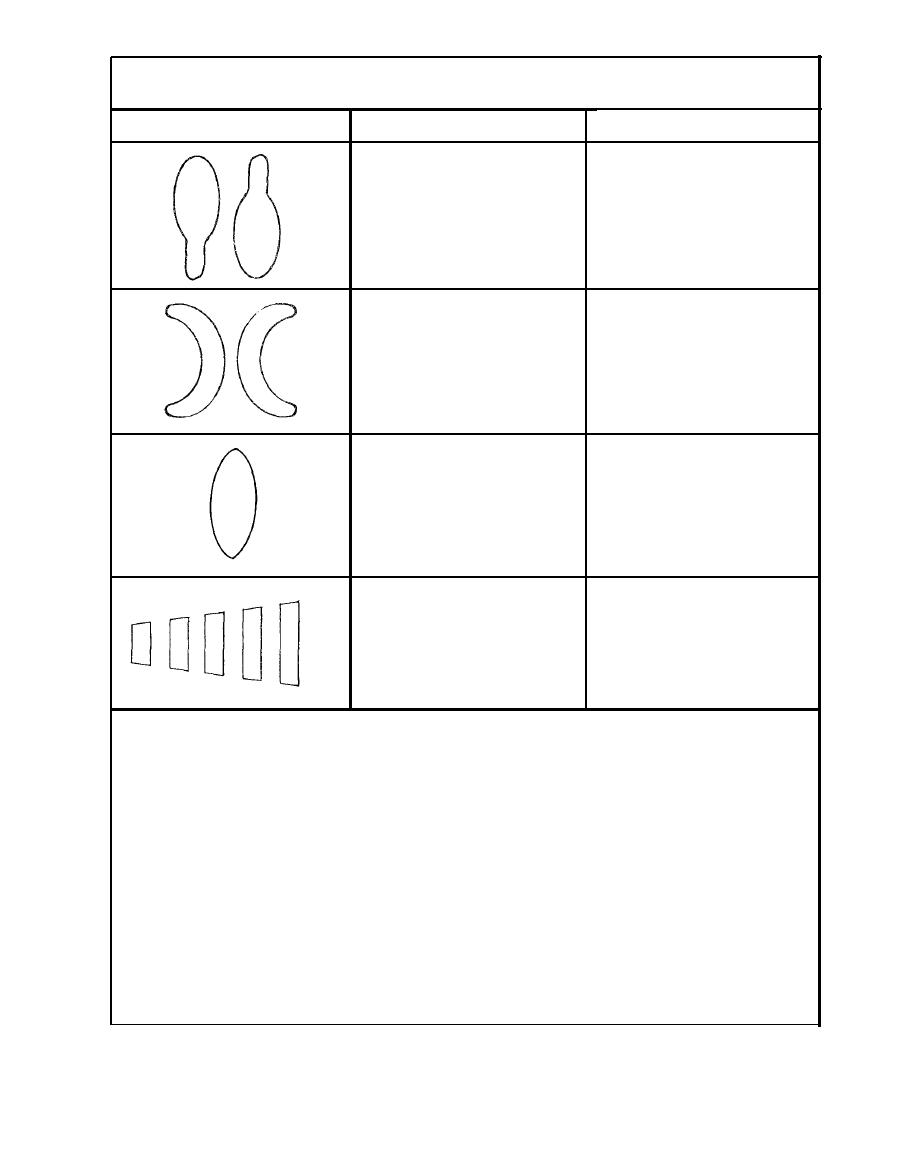
CORRECTION
CAUSE
PATTERN
Dissolve material in side ports with
Dried Material in side port hole, re
thinner.
stricts passage of air. Greater flow of
air from clean side port hole forces fan
Do not use metal Instrument.
pattern in direction of clogged side.
Dried material build-up on the outside
Remove air nozzle and clean off fluid
of the fluid nozzle tip restricts the
tip, using rag, wet with thinner.
passage of atomizing air at one point
Tighten air ozzle.
through the center opening of air noz-
zle. This pattern may be caused by
loose air nozzle.
A split spray or one that is heavy on
Reducing air pressure wilI correct
each end and weak in middle by (1)
cause (1). To correct cause (2), open
fluid control needle, at the same time
too high an atomization air pressure,
or (2) by too wide a spray pattern
turn fan control in. This wiII reduce
with thin material.
width of spray but wiII correct split
spray pattern.
1. Fill Cup
1. Insufflcient fluid in cup
2. Obstructed fluid passage or hose.
2. Clean
3. Retighten or replace
3. Loose or defective cup
4. Retighten or replace
4. Loose fluid tip or defective
5. Lubricate or replace. Tighten
5. Dry or worn packing (5) or loose
packing nut (6).
MAINTENANCE & CLEANING
Lubrication Place a drop of Iight machine oil on:
a. fluid needle packing.
b. air valve packing.
c. fan control packing
d. trigger pivot point.
Coat the fluid control spring with petrolatum.
Cleaning Empty material from cup and replace with compatible thinner or solvent. Replace cup and spray
in the usual manner to flush passage thoroughly and to clean tip of needle.
To clean air and fluid nozzles, soak them in solvent to dissolve any dried material and blow clean with air,
Never immerse gun in solvent beyond spray head.
2
