
TM 5-3655-210-12
(3) Hook the spring into position on the priming
pressed air making sure the passages are clean.
lever and secure the lever with the pin (13).
Inspect the cover, bowl, and bail for chips, cracks, or
(4) Screw the fittings (4 and 5) into position on the
other defects. Inspect the threads for damage. Inspect
fuel pump.
the screen for tears or enlarged opening. Check the fuel
(5) Position the gasket (7) and the fuel pump (6) on
pump. Inspect the fuel line for breaks, thread damage
the engine crankcase and secure with the two
or other defects. Replace all damaged parts. Install a
capscrews (15) and lockwasher (14).
new oil seal and gaskets.
c. Reassembly and Installation.
(6) Position the packing (2) and the shut-off valve
and packing nut assembly (1) in the cover (3) and
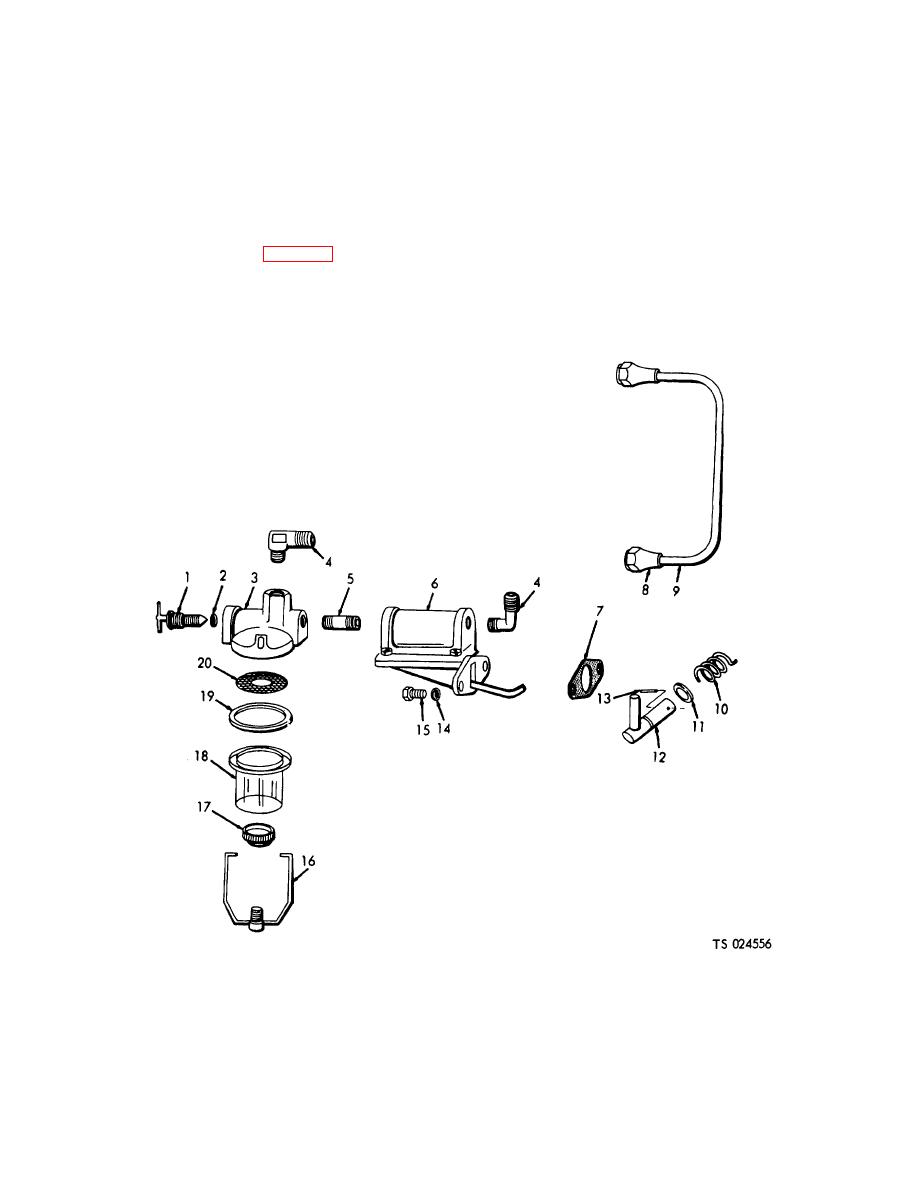
(1) Position the spring (10, fig. 4-31) on the engine
secure with the packing nut.
crankcase.
(7) Screw the fitting (4) into the cover (3) and screw
(2) Install the packing (11) in the priming lever (12)
the cover into position on the fuel pump (6).
and position the lever in the crankcase
.
1.
Shut-off valve and packing nut
6.
Fuel pump
11.
Preformea packing
16.
Ball
2.
Packing
7.
Gasket
12.
Primer lever
17.
Thumb nut
3.
Cover
8.
Tube nut
13.
Pin
18.
Sediment bowl
4.
Elbow
9.
Fuel tube
14.
19.
Gasket
5.
Pipe nipple
10.
Spring
15.
Capscrew
20.
Screen
Figure 4-31. Fuel filter, exploded view.
4-37
